Should you really bother taking a big conspicuous DSLR camera on vacation with you, even if you’re going to potentially dangerous or non-camera friendly places?
Yes. Definitely. If you have one – take it.
They aren’t the most subtle of cameras, and I wouldn’t walk around some cities with my DSLR hanging off my arm. Despite the extra weight, I would have deeply regretted not bringing my DSLR with me.
Don’t worry about being out of place. Most tourists have one these days. On a couple of tours I’ve been on, almost everyone in our group had one, several had two, plus tripods.
If you are thinking of taking one, here are some DSLR travel tips:
1. Take decent lenses
Invest in and take the best lenses that you can afford. Good quality lenses make the world of difference to your images and you don’t want to be wandering what the results would have been had you spent a bit more on your glass. (My biggest regret is not having taken better lenses.)
Fast lenses are brilliant for low light photography. Internally focusing lenses minimise the risk of getting particles inside the camera, and are great for sandy (beach/desert) or dusty (safari) conditions.
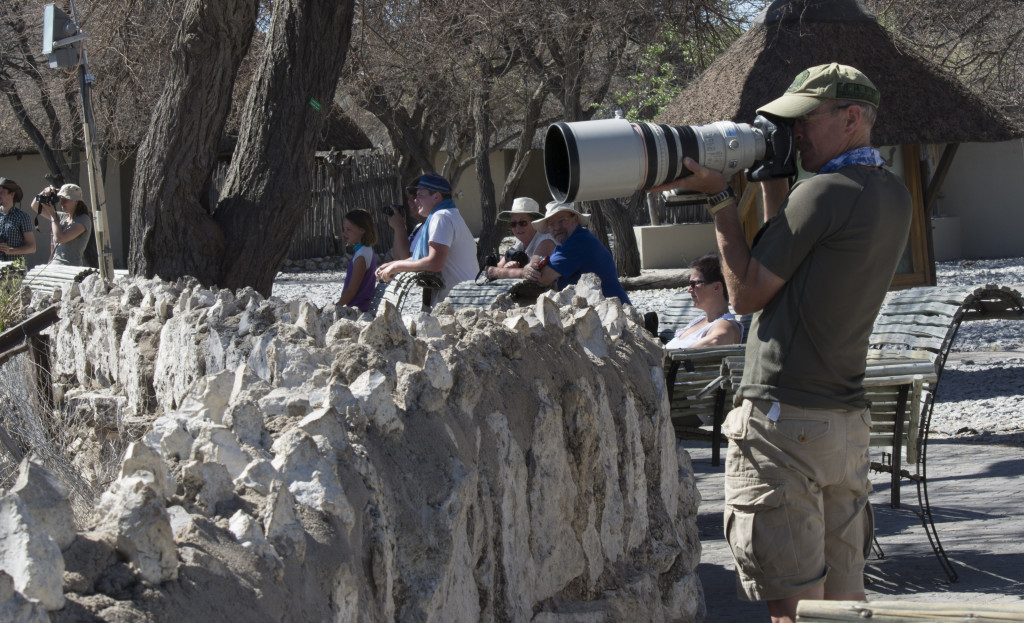
If you’re going on safari or might be taking some animal or bird shots, get the best zoom lens you can afford, (without it being too heavy obviously). We settled on one that stretched to 300mm, but in hindsight should have taken a 400mm – it can really make a difference.
Bear in mind however that the longer the focal length, the more you will need a tripod. Like – WTF is the guy in the photograph above thinking?!
If you need to use a tripod, consider how much time and space you will have to use it. If you’re going on safari with a group for example, your chances of being able to dictate where the vehicle goes and how long you stay in one place might be slim. If you’re travelling with your own vehicle or hiking then consider taking one.
2. Take a cleaning kit
Dust and smudges on your lenses will occur, so make sure you have decent filters and a cleaning kit. A good lens pen and cleaning cloths are essential.
Blowers are useful pieces to get rid of sand/dust.
3. Protect your kit
If you’re going on safari, take a towel or something to cover your camera when you’re not using it. There will be plenty of times where you will be driving along dusty roads with the camera ready to shoot in case a tiger pops up, and you don’t want it being covered with dust in the meantime.
A rag wrapped around your lens can also create some stability during bumpy rides – it will protect your lens from knocks and will give you a more stable service on which to lean your lens.
If you’ll be shooting near water, kayaking or canoeing, good quality dry bags are a must.
3. Take replacement accessories
Having lost two lens caps, I know how useful spare caps can be. You need them to protect your lens/the filter.
Spare filters are also useful, filters occasionally fall off and you never know when you might have an accident so take a spare. It’s much easier to replace a filter than it is to replace a lens, I’m still shocked when I see people not using them. (A filter is far easier to replace than a scratched lens!).
4. Know in advance where you can go if things go wrong
Look up large camera kit stores and service centres in the cities and towns that are on your journey. Most Lonely Planet guides mention the best cities for solving camera issues.
I tripped and smashed my camera on my way down Kilimanjaro. The lens broke and was almost snapped in half. Thankfully the body somehow survived but I was unable to buy a replacement wide angle for several weeks.
If I’d have done my homework I should have known that Dar es Salaam where I was going to be in a few days was the best place to find a replacement lens. Thanks to limited internet access, I sadly didn’t figure this out until after we left Dar, and was unable to buy a replacement for another five weeks…

It can be cheaper and quicker to get your camera serviced in other countries so consider popping in to an official Nikon or Canon service centre en route.
I had a problem with my camera’s sensor and managed to get it serviced by the Nikon office in New Delhi for a fraction of what it would cost me in the UK.
Trying to solve camera equipment problems with dodgy Internet connections took a lot of time. If I had had that information in advance, I would have saved a lot of time and stress.
5. Protect your camera from theft
Shoulder bags such as those made by Timbuktu/Thinktank/Domke are great for protecting your equipment and don’t look like traditional camera bags. Some have labels but these can easily be removed. Non-obvious camera bags help hide the fact that you are carrying hundreds if not thousands of dollars in expensive camera gear, and decreases the risk that you might be targeted by robbers.
You can also buy silencer strips for any noisy velcro fastenings your bag might have.
Non-camera branded camera straps can also be useful and far less conspicuous than the usual bright yellow and black Nikon ones. Branded straps not only advertise the fact that you’re carrying a very expensive piece of equipment, but often indicate what model, and the approximate worth, of your camera.
Don’t be scared of making your camera look a bit more worn than it really is as per Joey Lawrence’s excellent advice. A beaten up looking piece of kit is not going to be half as appealing to a robber as the clean, good looking model nearby.
Be weary of carrying your camera around your neck, it’s easy for anyone to grab the strap and lift it over your head. Consider carrying it with the strap hanging across your body or under a jacket.
6. Take more than one lens
There are lots of advantages with taking one lens with a broad focal length range, say 18-200. You don’t have to change lenses and have a lot more flexibility.
However, if something happens to that lens, you’re effectively stuck with no camera until you can get a replacement.
One of the SLR’s assets is that you can change lenses, (I met a few people whose compact lenses got stuck and they had to put up with their mobile phone camera for the rest of the trip). Make the most of that feature, and take more than one lens, even if it’s not a direct replacement.
When my wide angle lens broke, I fortunately had a separate zoom lens. (I was also lucky considering that I was about to go on a series of safaris, and the zoom was definitely the most important lens for me to have at the time). If I had only taken one lens I would have been completely lost. I missed a lot of potentially good wide angle shots after it broke, but I might never have got some of the good ones I took, had the wide angle not broken in the first place. I also had my iphone camera as a back up.
Be careful when you change lenses, especially in windy environments when dust can be blown into the camera. Holding the camera pointing downwards when you change helps minimse dust and debris being blown in, or falling into the camera body.
7. Take more memory than you think you need and back up back up back up!
Take lots of memory cards and at least one other device on which you can back up your photographs.
Several, smaller memory cards, are better than one huge card. This minimises the risk of losing photos. We met people who had lost memory cards or had them corrupted and lost all their photos – don’t let that be you.
When backing up, aim to have at least two copies stored in two different places. I use my laptop with two robust separate hard drives protected by rugged plastic cases. The cases are worth buying and should only be around $20 each. I’ve dropped my hard drives a few times so they do work! I usually carry one hard drive with me at all times.
On a long journey, if I’m passing through a good friend or family’s house, I’ll buy another hard drive and leave one complete copy of whatever images I’ve taken so far with them.
Don’t rely on being able to upload your photos to the cloud. In Africa and parts of Asia for example, we had hardly any decent internet connections. We were unable to access email let alone upload a series of large files.
Don’t rely on being able to edit your images while you’re on the road. We went days without any power, and were often short on time. Take enough memory to cover all of the images you think you might take over a few days at least.
8. Take pictures of people but be respectful
Photos of local people can be some of the most interesting photos you will take.
Some street photographers disagree, but generally when taking pictures of people, especially up close, always ask permission first.
For children, ask their parents. Most people I know wouldn’t want strangers pointing a camera inches in front of their children’s faces without their permission. If the parents or the kids say no – respect that. It’s only a photo after all, rarely is there a good reason for making someone feel uncomfortable or upset.
Some people want money for photos. Others believe that being photographed is like losing a piece of their soul. Whatever they think, be respectful. I’m always amazed by the number of tourists who feel that “interacting” with locals equals shamelessly taking photos of them regardless of how local people feel about it.
If you can, try to get your subject’s name and address and send them a print of the photo. We visited villages where tourists had done this and were told that it was much appreciated by the locals.
9. Know when not to take your camera with you
In some dodgy areas you have to be prepared to potentially lose everything you go out with.
In dodgy areas at night, or where I knew we would be going clubbing or drinking, I didn’t always feel comfortable taking my SLR with me so took my mobile phone instead. Others took a cheaper compact or a smaller camera.
On those evenings, I would always leave my camera locked up at wherever we were staying. Some things aren’t worth risking.
There will be other times when it might not be safe or permissible to photograph people or places, in which case just focus on enjoying the moment.
10. Take out adequate insurance
Hopefully you won’t need it but if something happens to your gear (camera body, lenses, laptop, hard drives) then you will want to be adequately insured.
If you’re relying on a generic policy, check that your camera and lenses are adequately covered and that the excess is not too expensive. Some insurers have a limit on the number or replacement value of your most expensive items.
Otherwise go with a company specialising in camera equipment such as Photo Guard, and make sure that all your camera equipment is registered properly. Look over the policy and know of any exceptions. (My policy doesn’t cover me if my camera gear is stolen from a vehicle for example.) Don’t forget to update your inventory if you buy or replace bits of your kit too.
One thought on “DSLR Travel Tips”
Comments are closed.